DIY
Super Mario Galaxy amiibo
DIY Display Showcase
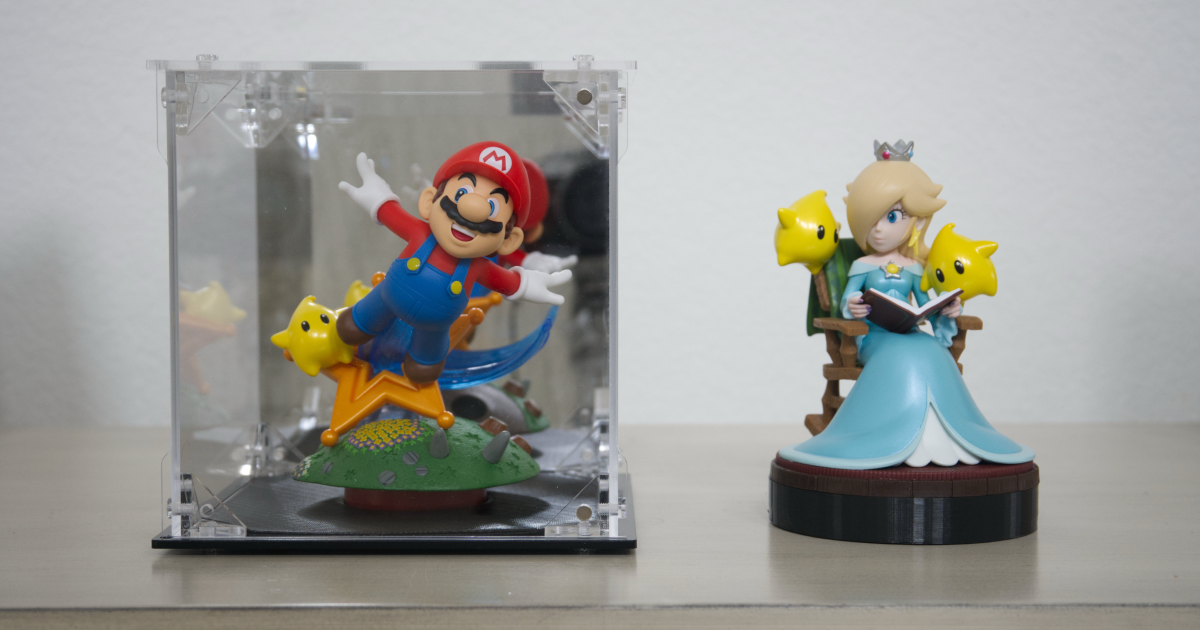
Nintendo recently released two new amiibo figures for the re-releases of Super Mario Galaxy and Super Mario Galaxy 2. amiibo are a line of toys-to-life figurines that interact with various Nintendo games to grant in-game rewards or functionality. The two new figures are called “Mario and Luma” and “Rosalina and Lumas”.
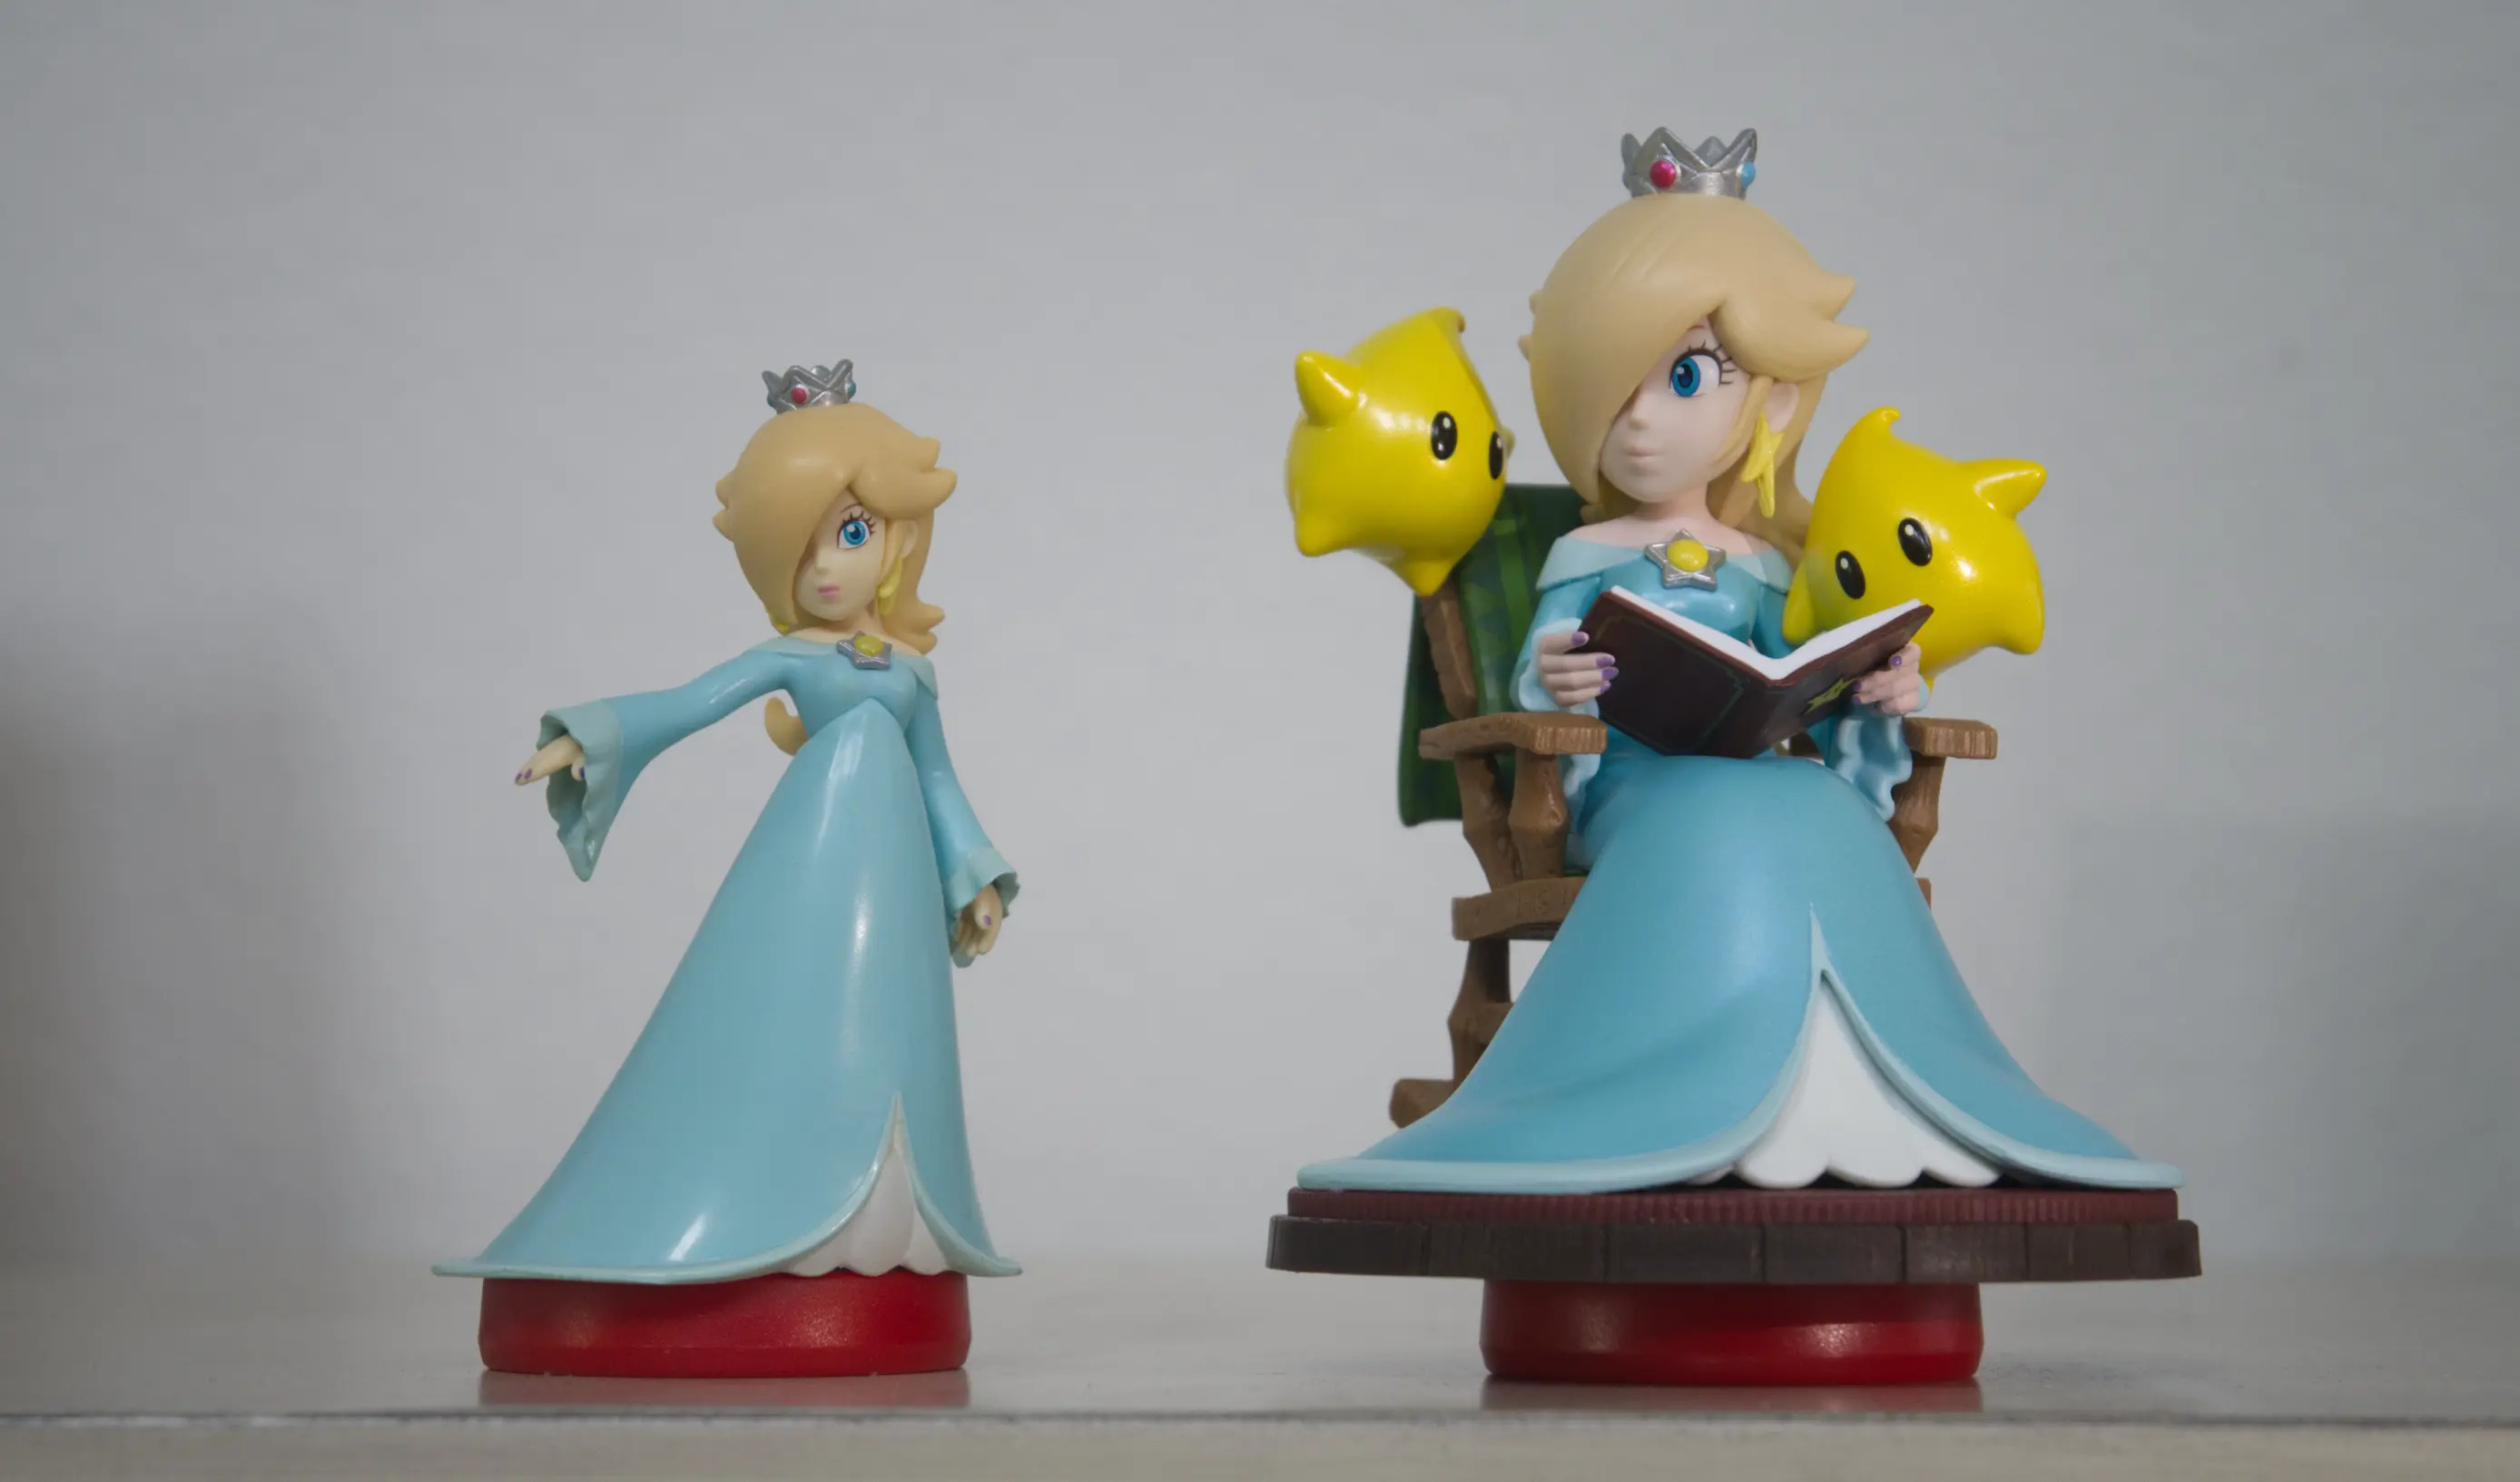
These amiibo are significantly different than typical amiibo figures. In particular, they are much larger than regular amiibo (despite sharing the same base size), which makes them a bit difficult to display among existing collections.
This also means these are some of the most detailed amiibo yet, which warrants a different way of showcasing them. In this post, I’ll go over a few ways I went about creating displays for them.
Acrylic Display Case
This method is pretty simple and protects the amiibo from dust. I originally tried to see if these amiibo would fit in the officially licensed (but discontinued) amiibo display box to no avail. So instead, I found this reasonably priced acrylic display case from Dezzer with good reviews. The 6”x6”x6” size was perfect for this amiibo.
Assembly is fairly simple and the final result looked really nice. There’s a magnetic door for easy access and a mirror inside to see both sides of the figure.
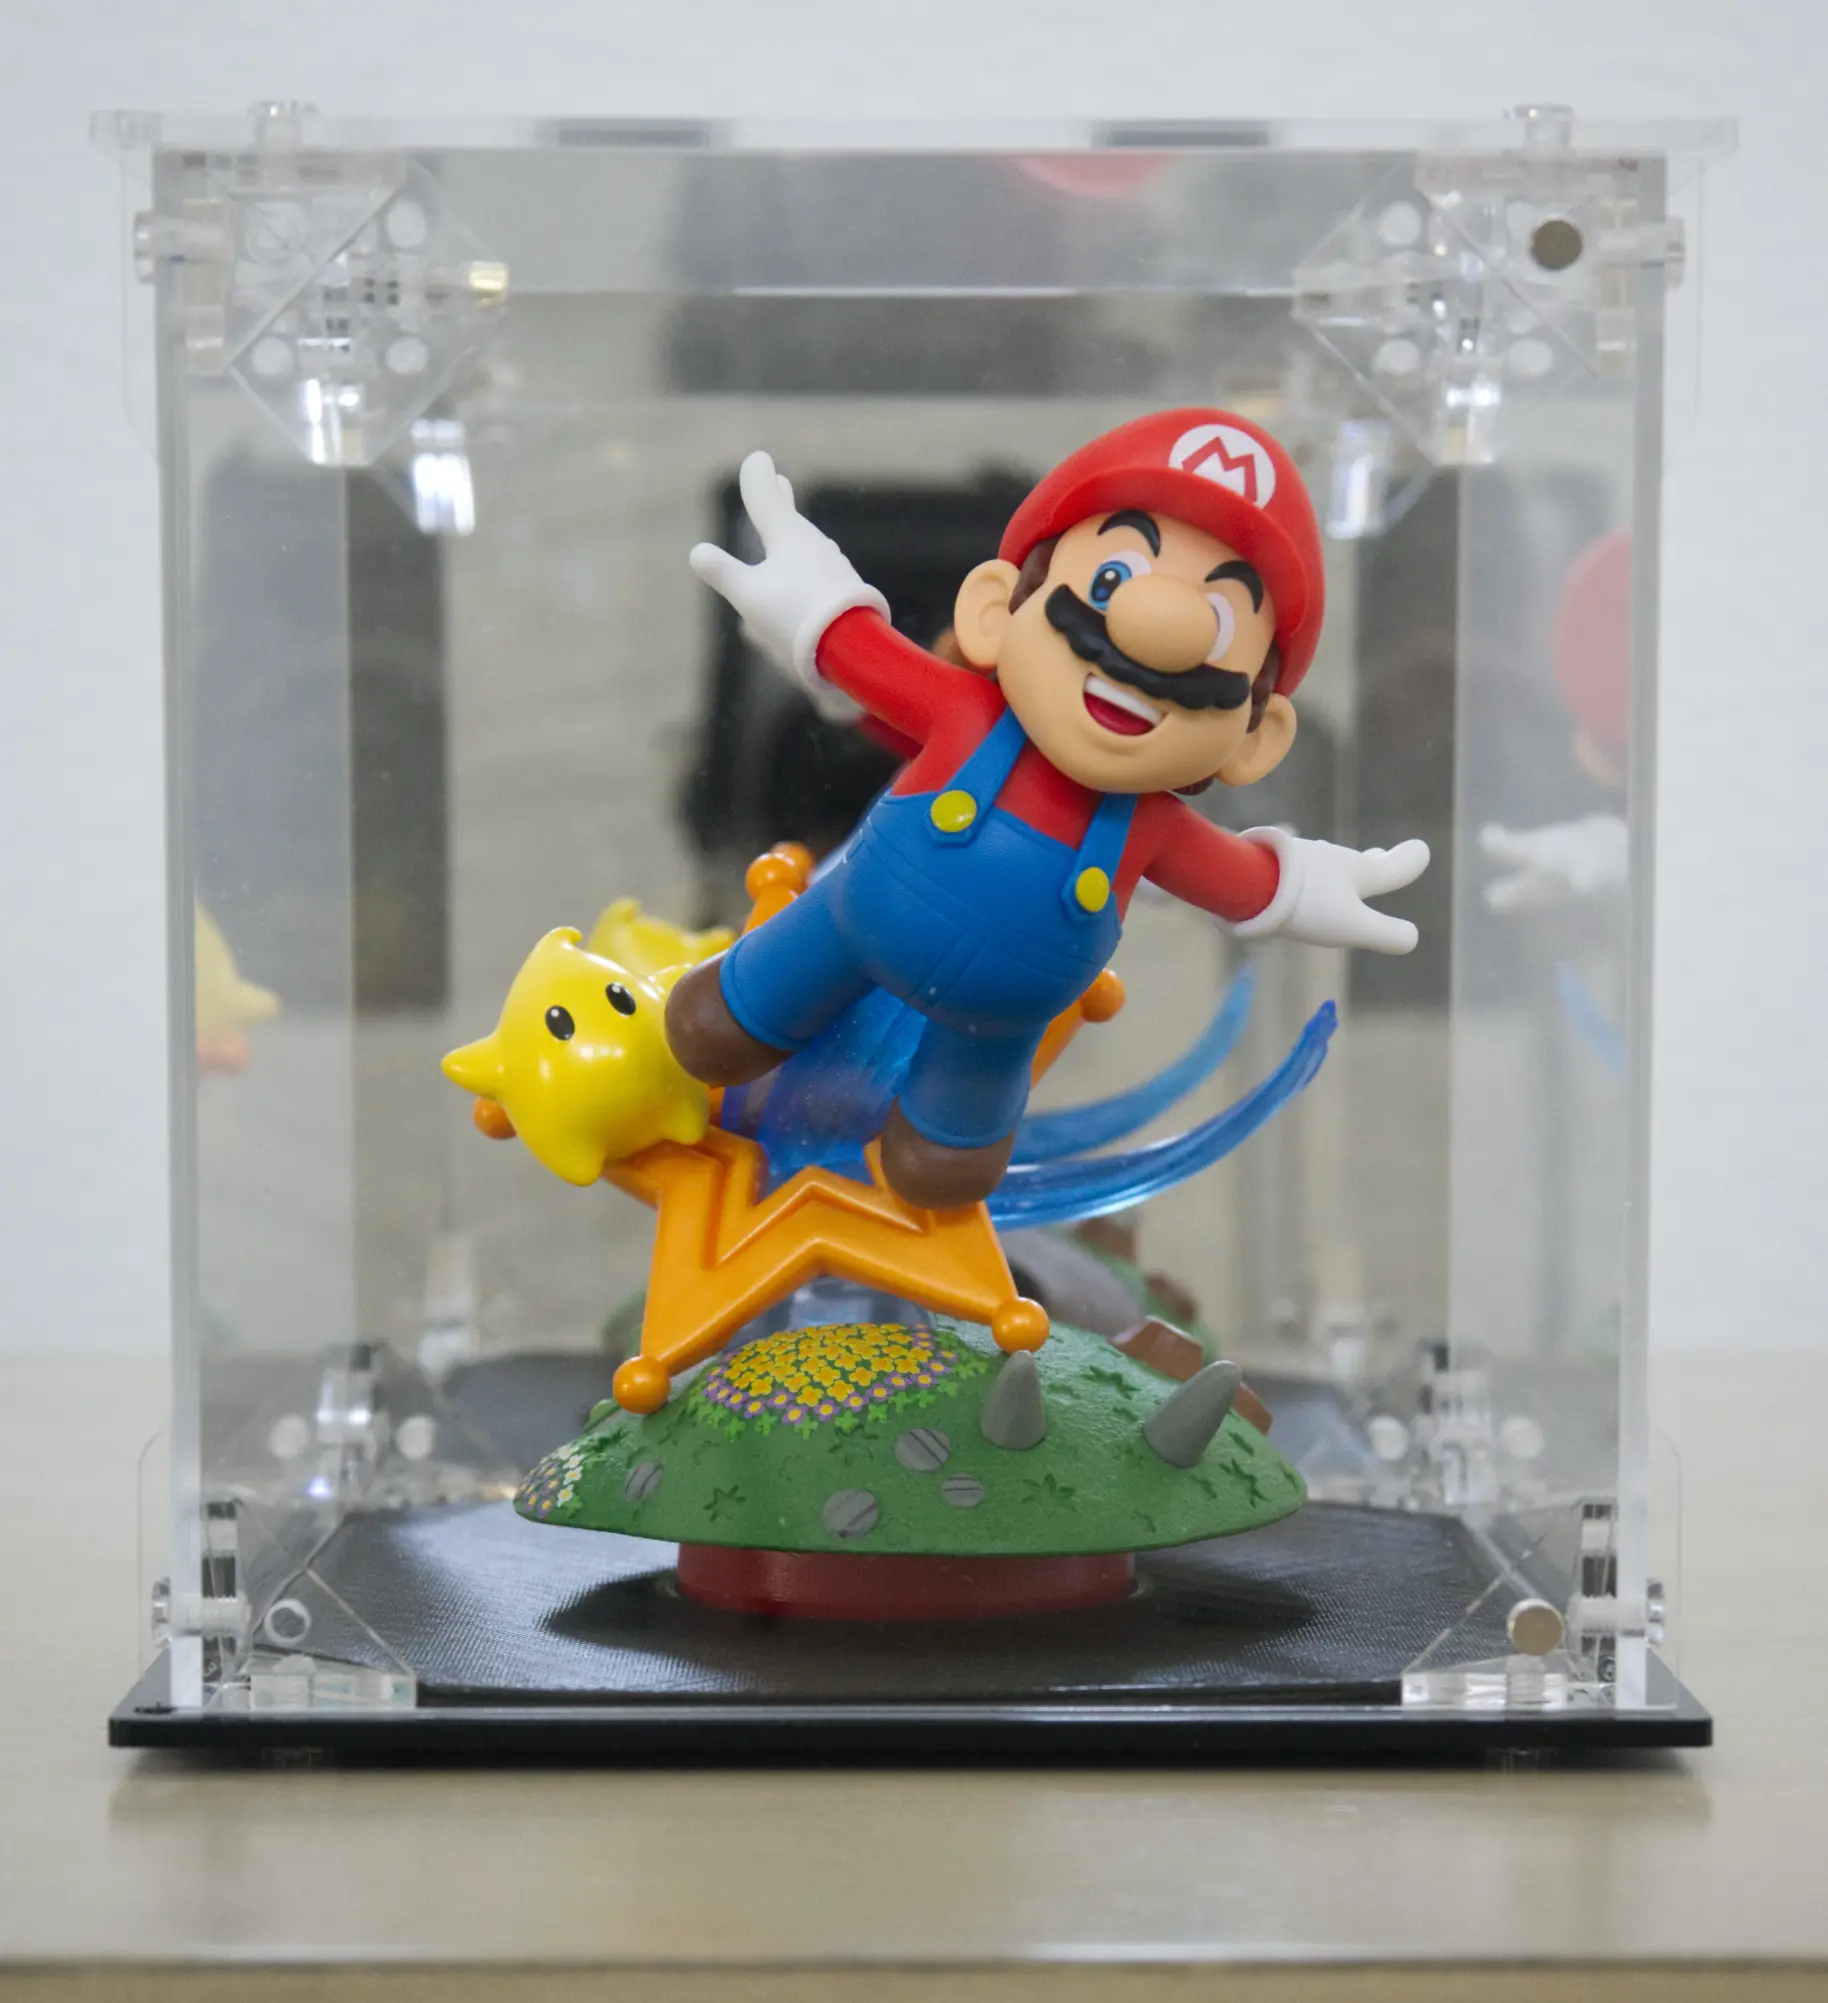
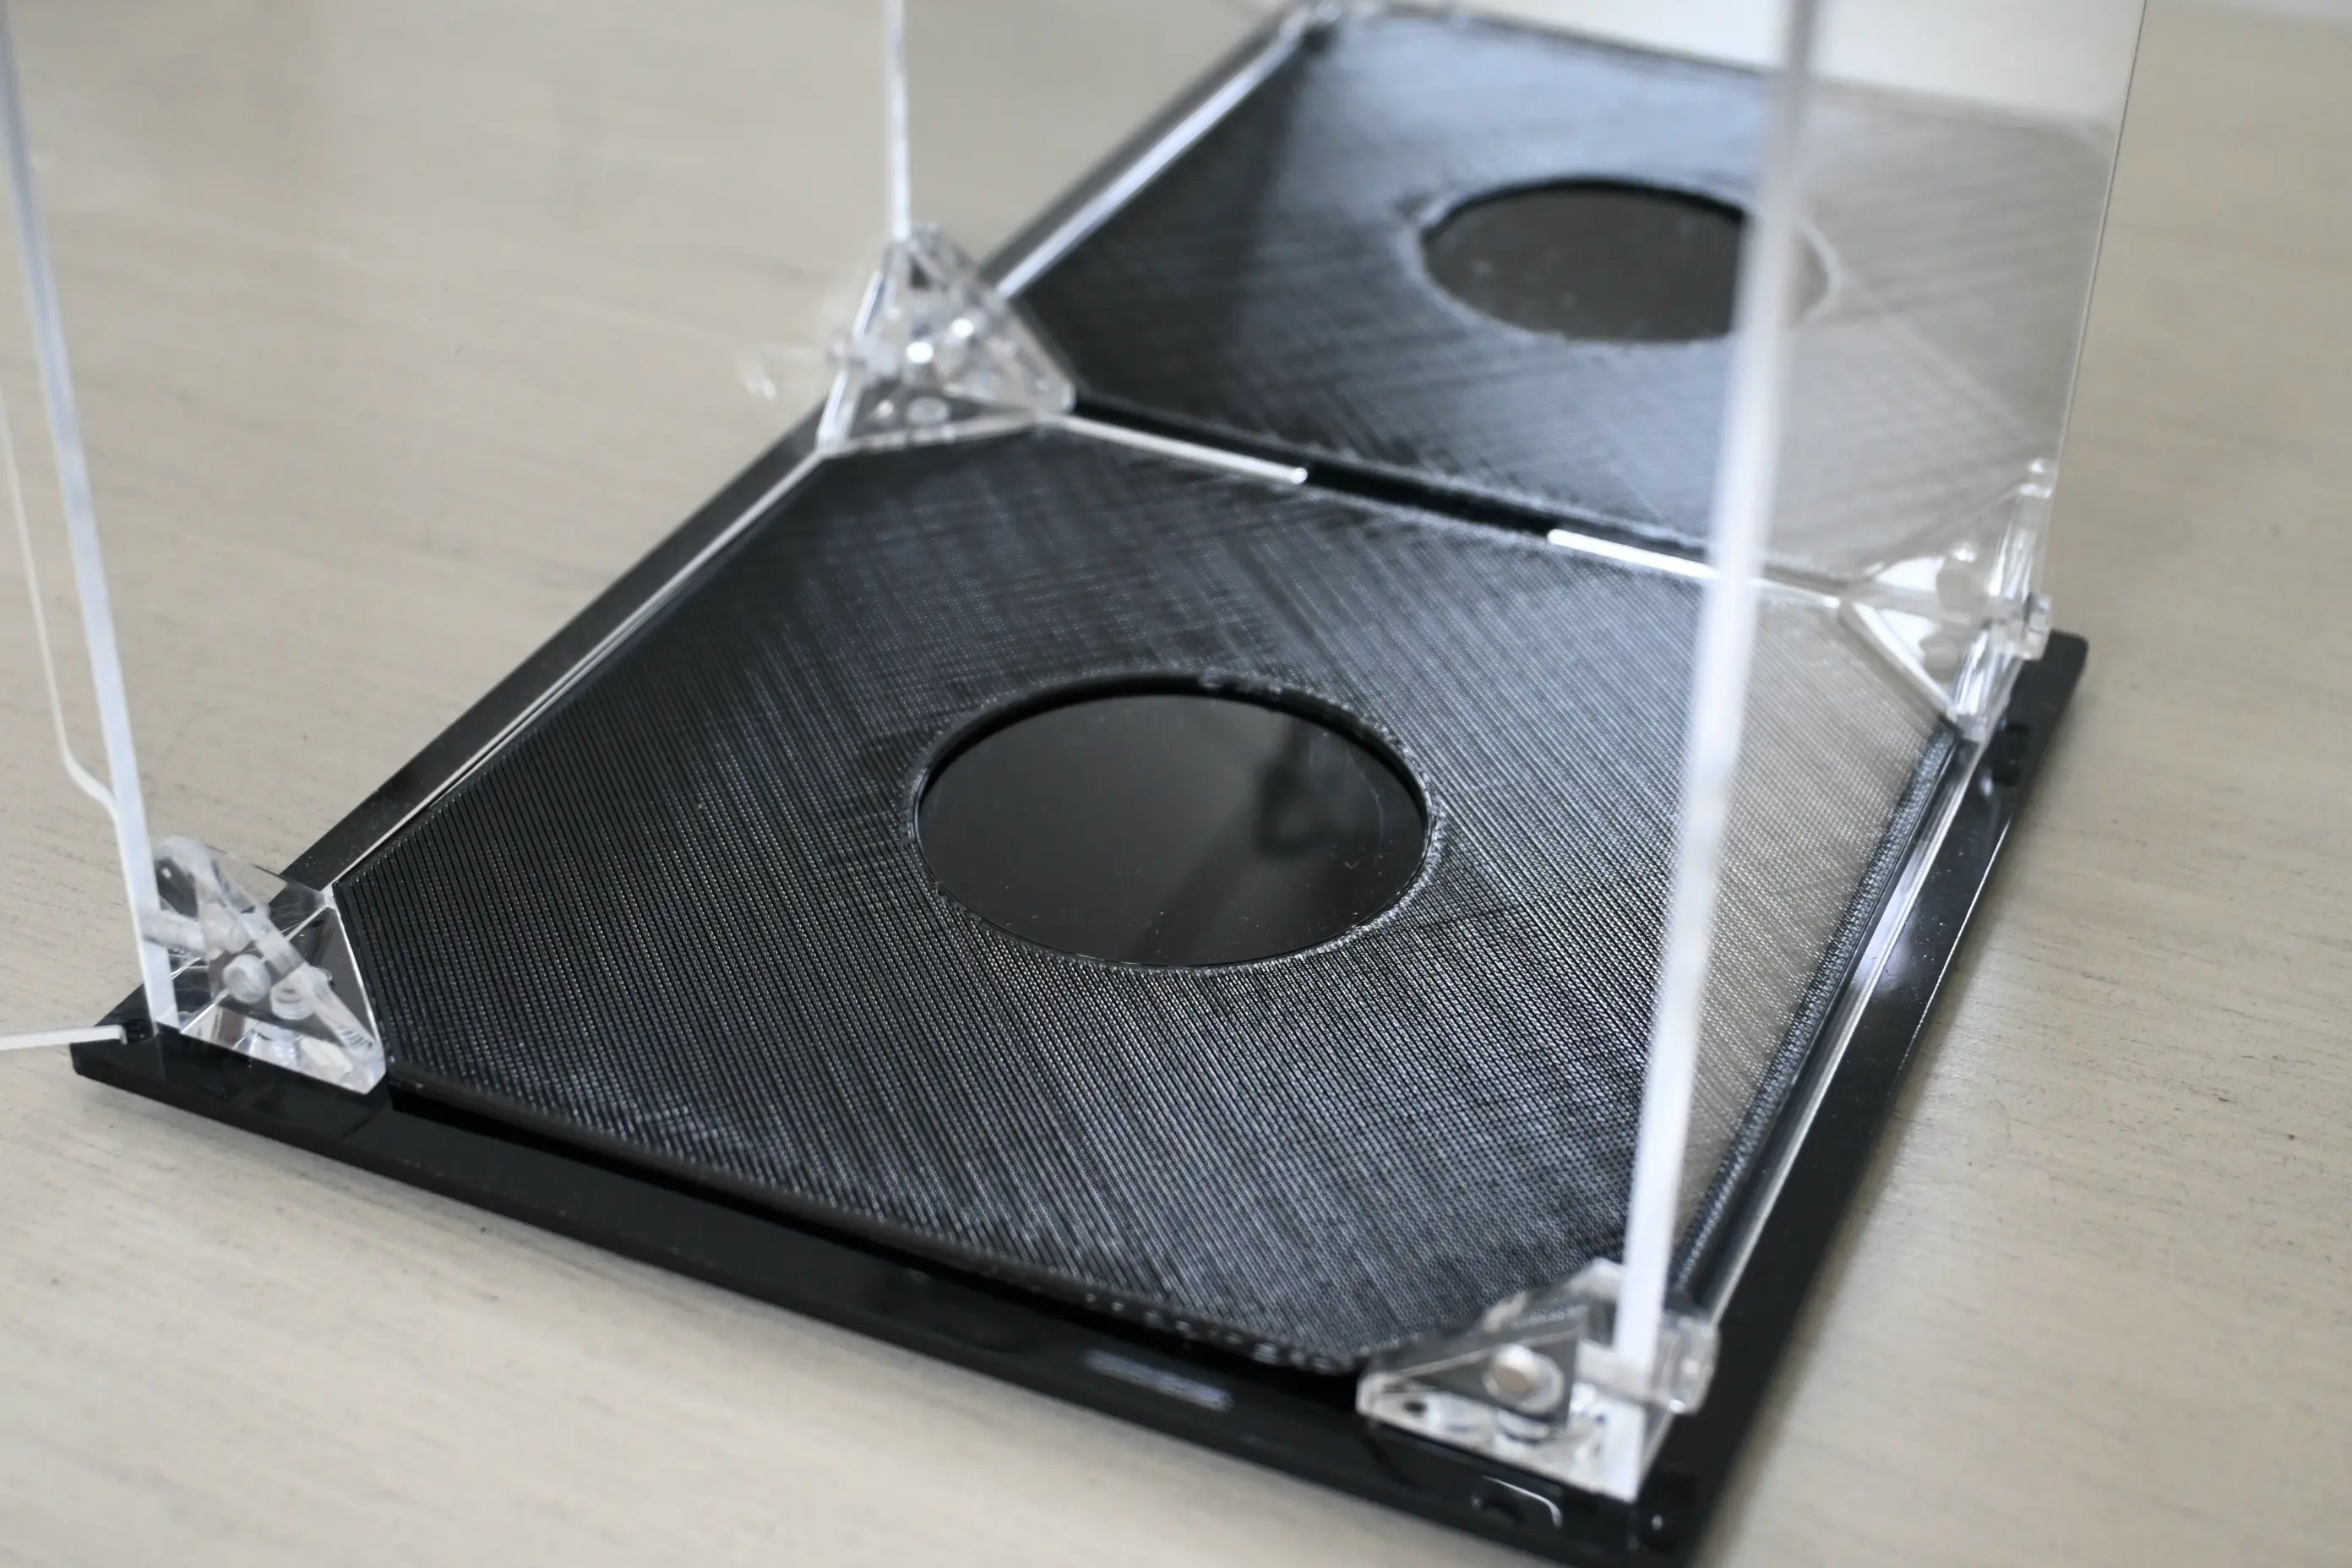
However, the one issue I had with this was aligning the figure to be in the center. To remedy this, I modeled a mat with a cutout of the amiibo base to make placement easy. It fits this display case perfectly and blends in when printed with black filament.
STL Files
Note: For the alignment mat, you will need to scale the Z-axis down (disable uniform scaling) to around 1-2mm in your slicer. Otherwise, this will print a much thicker alignment guide that can make it difficult to get your amiibo out of.
3D-Printed Stand
The first method is great if you want to display the amiibo as-is. However, if you’re not a fan of the base sticking out from the bottom of the figures, this method might be for you.
In recent years, amiibo have been using extended surfaces to help provide structural stability to the figure. I think this is fine for the most part, as it provides a creative solution to adding support for these figures.
That said, the bases on these larger amiibo feel out of place. The base feels like it’s there out of obligation, which is strange because the Detective Pikachu amiibo was also a much larger amiibo and it simply expanded the base size to compensate. So this solution will aim to hide the base when the amiibo is being displayed, while also allowing the amiibo to be removed from the stand.
A quick side note: designing the insert for the base of the Rosalina and Lumas amiibo took quite a few iterations, as I didn’t realize that the bottom of the base wasn’t center aligned, at least mine wasn’t. The standard-sized base is just a bit closer to the front, which means the amiibo also needs to be aligned when placing it in the stand.
My original design was to print an elevated stand that could fit an LED light source underneath. Then, a skirt would be placed around the original print to hide the light source. The hope was to allow for some ambient light to hit the figures, which would help all the details come out even in a dark room. Some warm light would also add to the library aesthetic of the Rosalina and Lumas amiibo.1 This didn’t work as well as I was hoping, as the LED candle I was hoping to use wasn’t bright enough for the task at hand. I also couldn’t find a battery-powered light source that fit the dimensions while also being bright enough. In hindsight, I should’ve printed using white filament to better reflect the light outwards, but I ultimately went in a different direction.
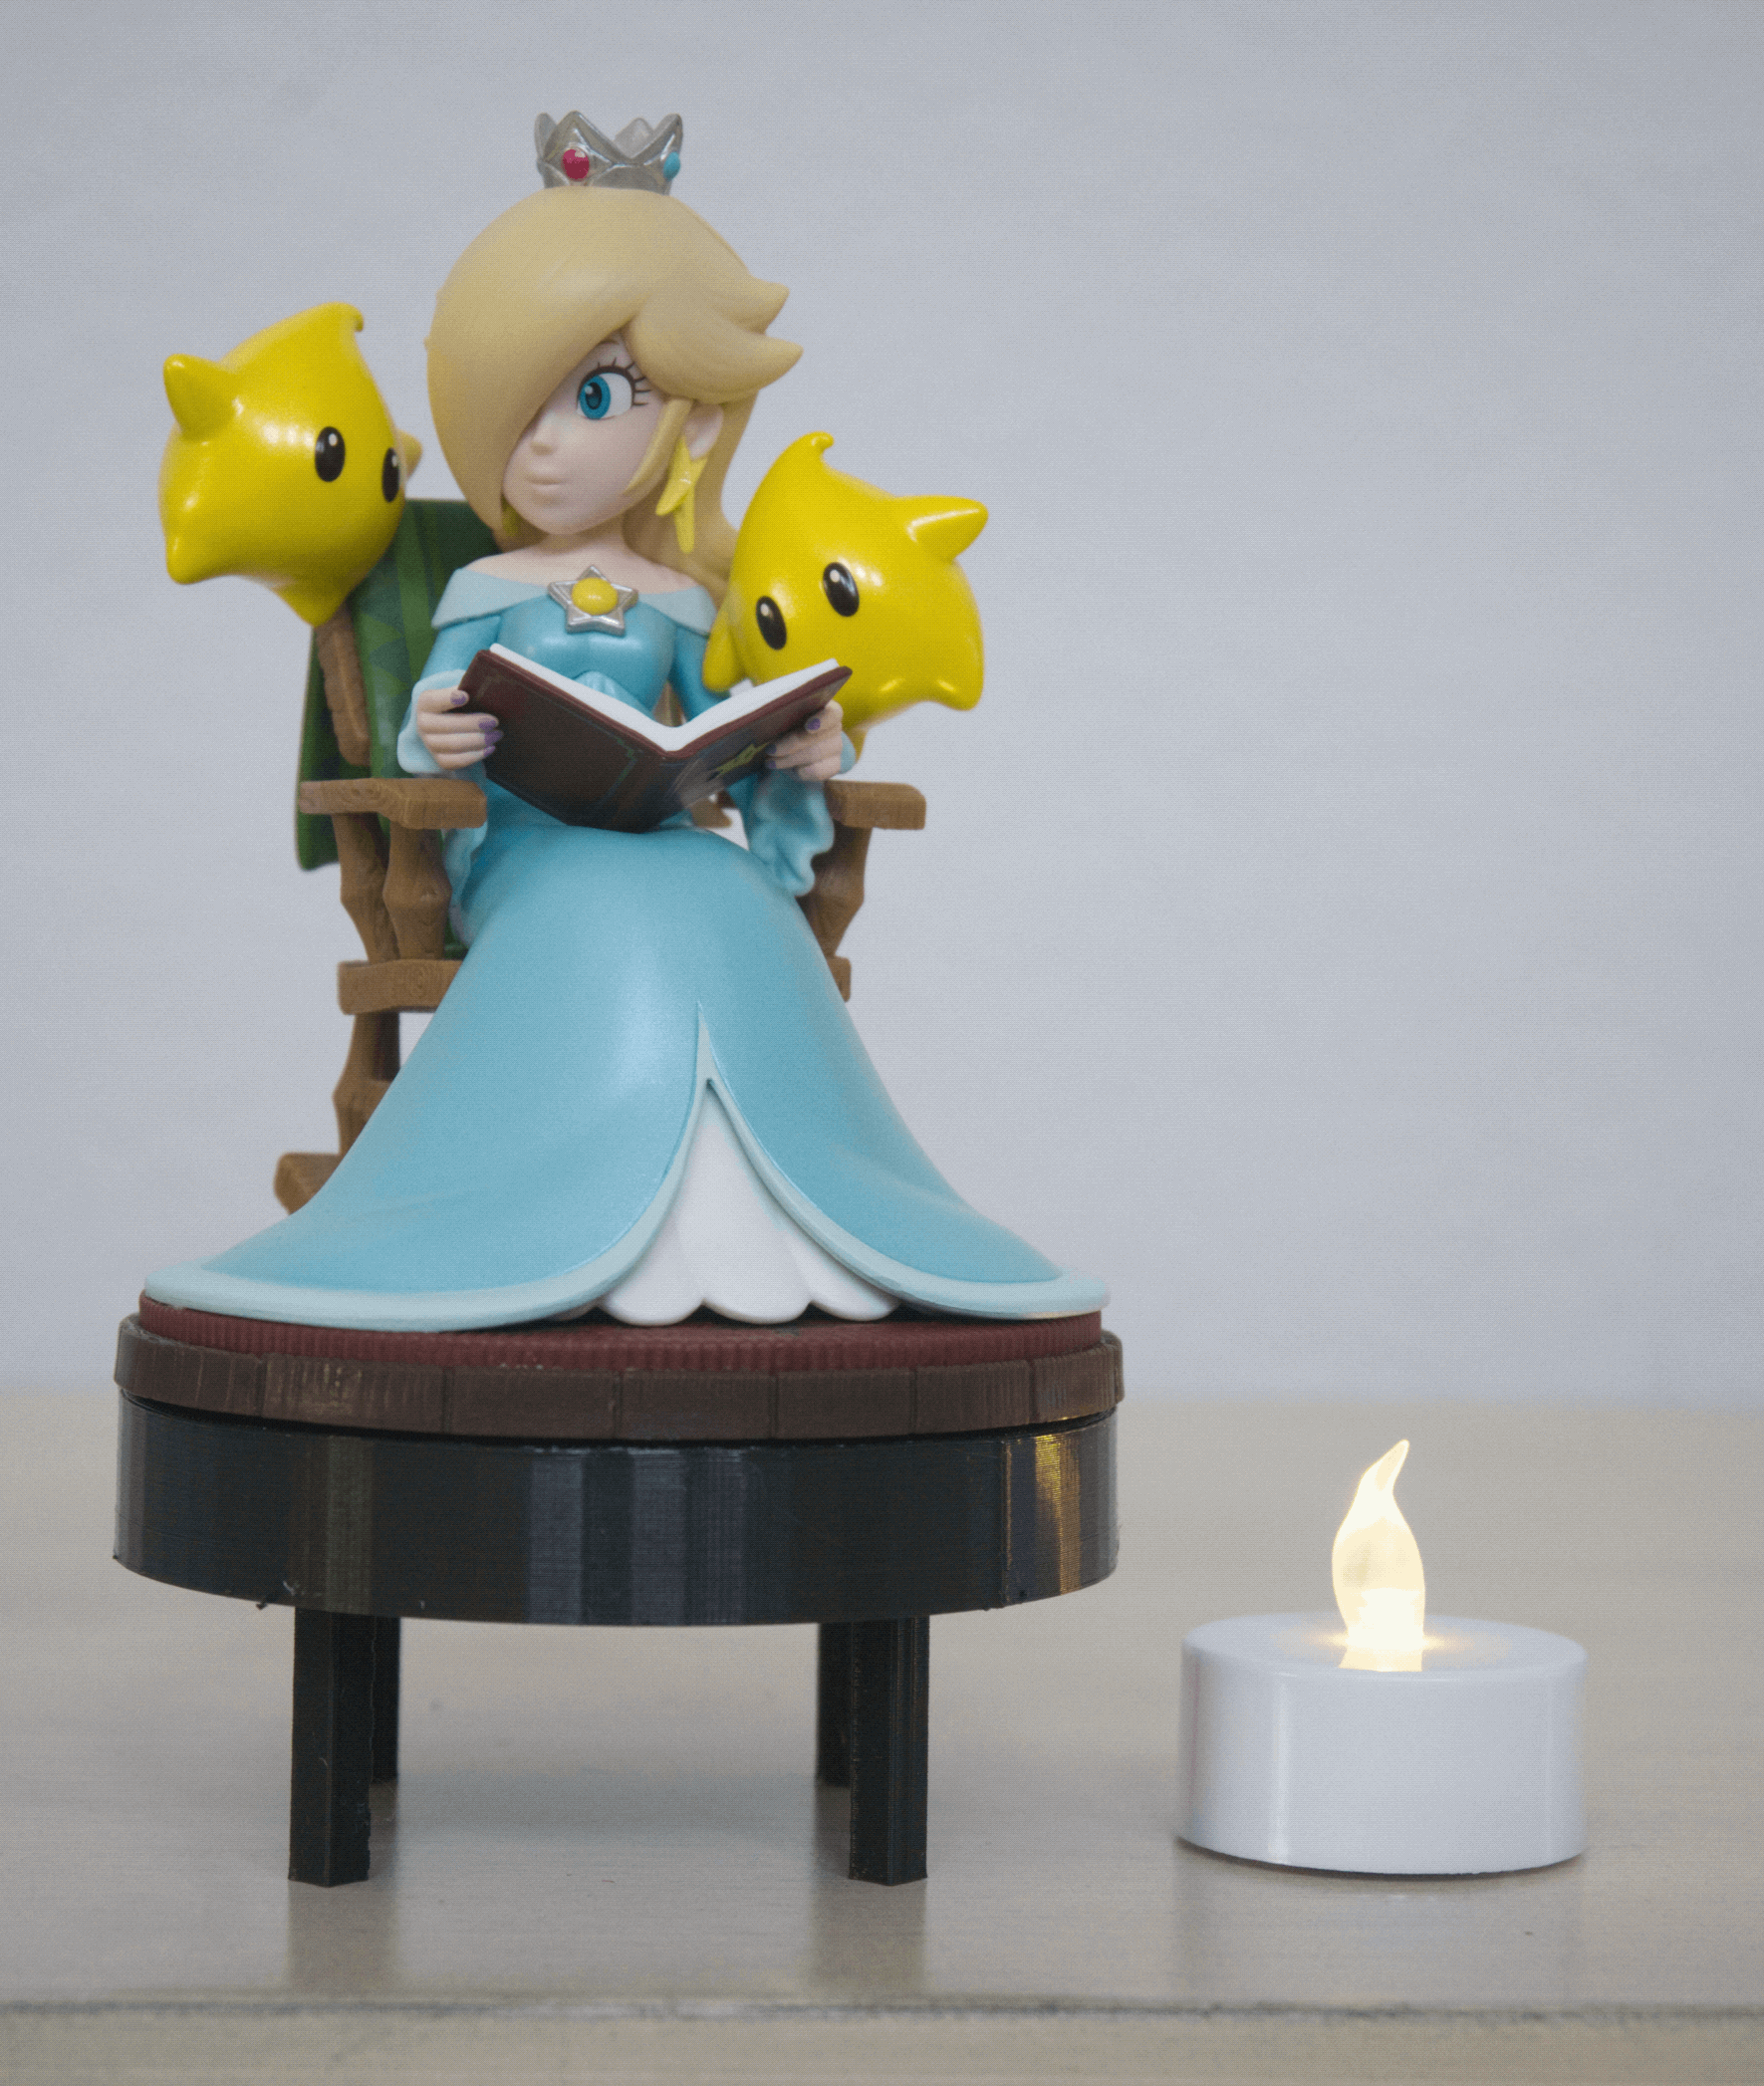
I figured this would be a good time to experiment with new filament types, so I went with a glow-in-the-dark PLA filament. This wouldn’t be as bright as an LED, but it would also allow the stand to be more compact and require no power management.
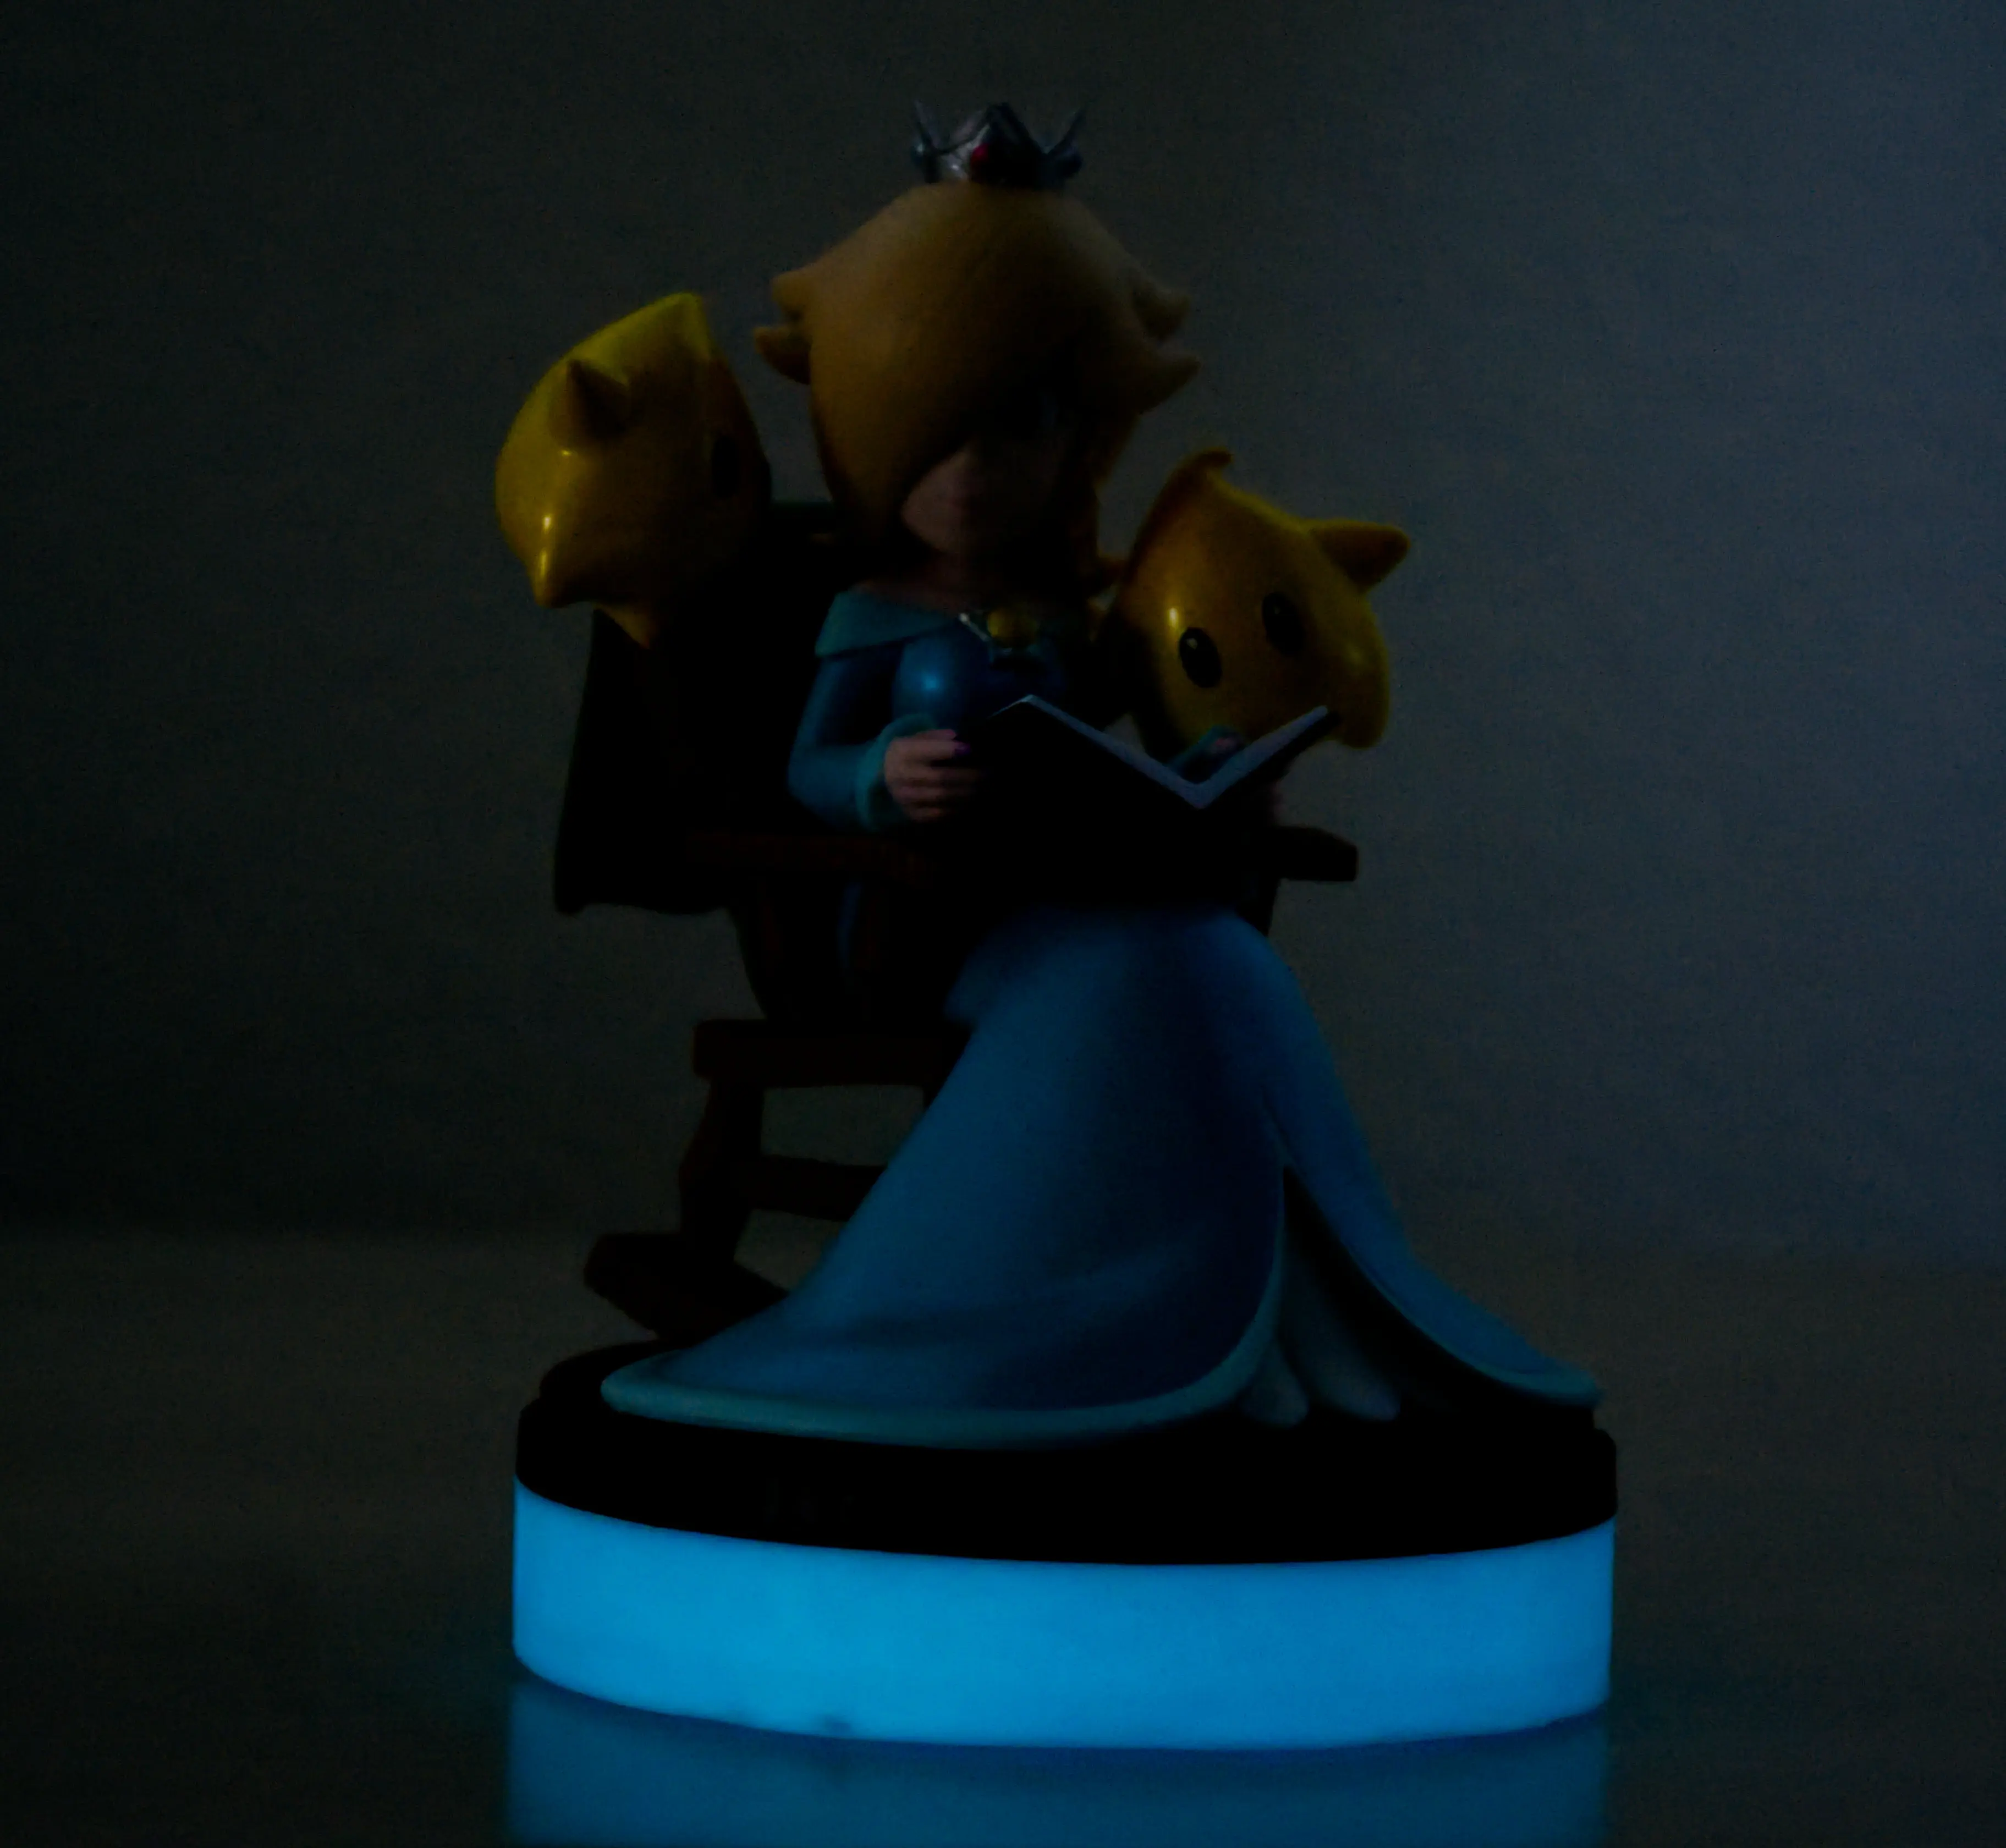
Unfortunately, this was a bit difficult to capture on camera, but hopefully this photo captures the idea. Once again, it’s a fairly simple design, but you can get pretty creative with your choice of filaments. If glow-in-the-dark isn’t your style, you can keep it simple with a black or white material, or try to match the amiibo’s grass or wood color. If you’re going for more of a galactic aesthetic, I also came across “galaxy black” filament and various chromatic filaments.
The design comes in two pieces: the base stand and an optional skirt. If you’re interested in experimenting, I would recommend printing the base stand in any material color and printing multiple variants of the skirt, as it consumes less material and is quicker to print while hiding most of the base. The skirt is fully optional, as it is a design vestige from my aforementioned original concept.
STL Files
Thoughts
Design-wise, these are up there with some of my favorite amiibo Nintendo has released, and their larger size is likely Nintendo testing the waters. amiibo functionality in games (in my opinion) peaked with their debut series, Super Smash Bros., and most other amiibo-compatible games haven’t captured the same magic. The advertised use of these two amiibo is just to give Mario a mushroom in Super Mario Galaxy.
To compensate for this, leaning more into the detailed figure angle over the toys-to-life angle is what I speculate Nintendo is trying to do. I don’t think every figure needs to be this large, but having these come out every once in a while for an anniversary or major event would be nice. Mario and Rosalina already have standard sized amiibo figures, so this isn’t ruining the consistency for me.
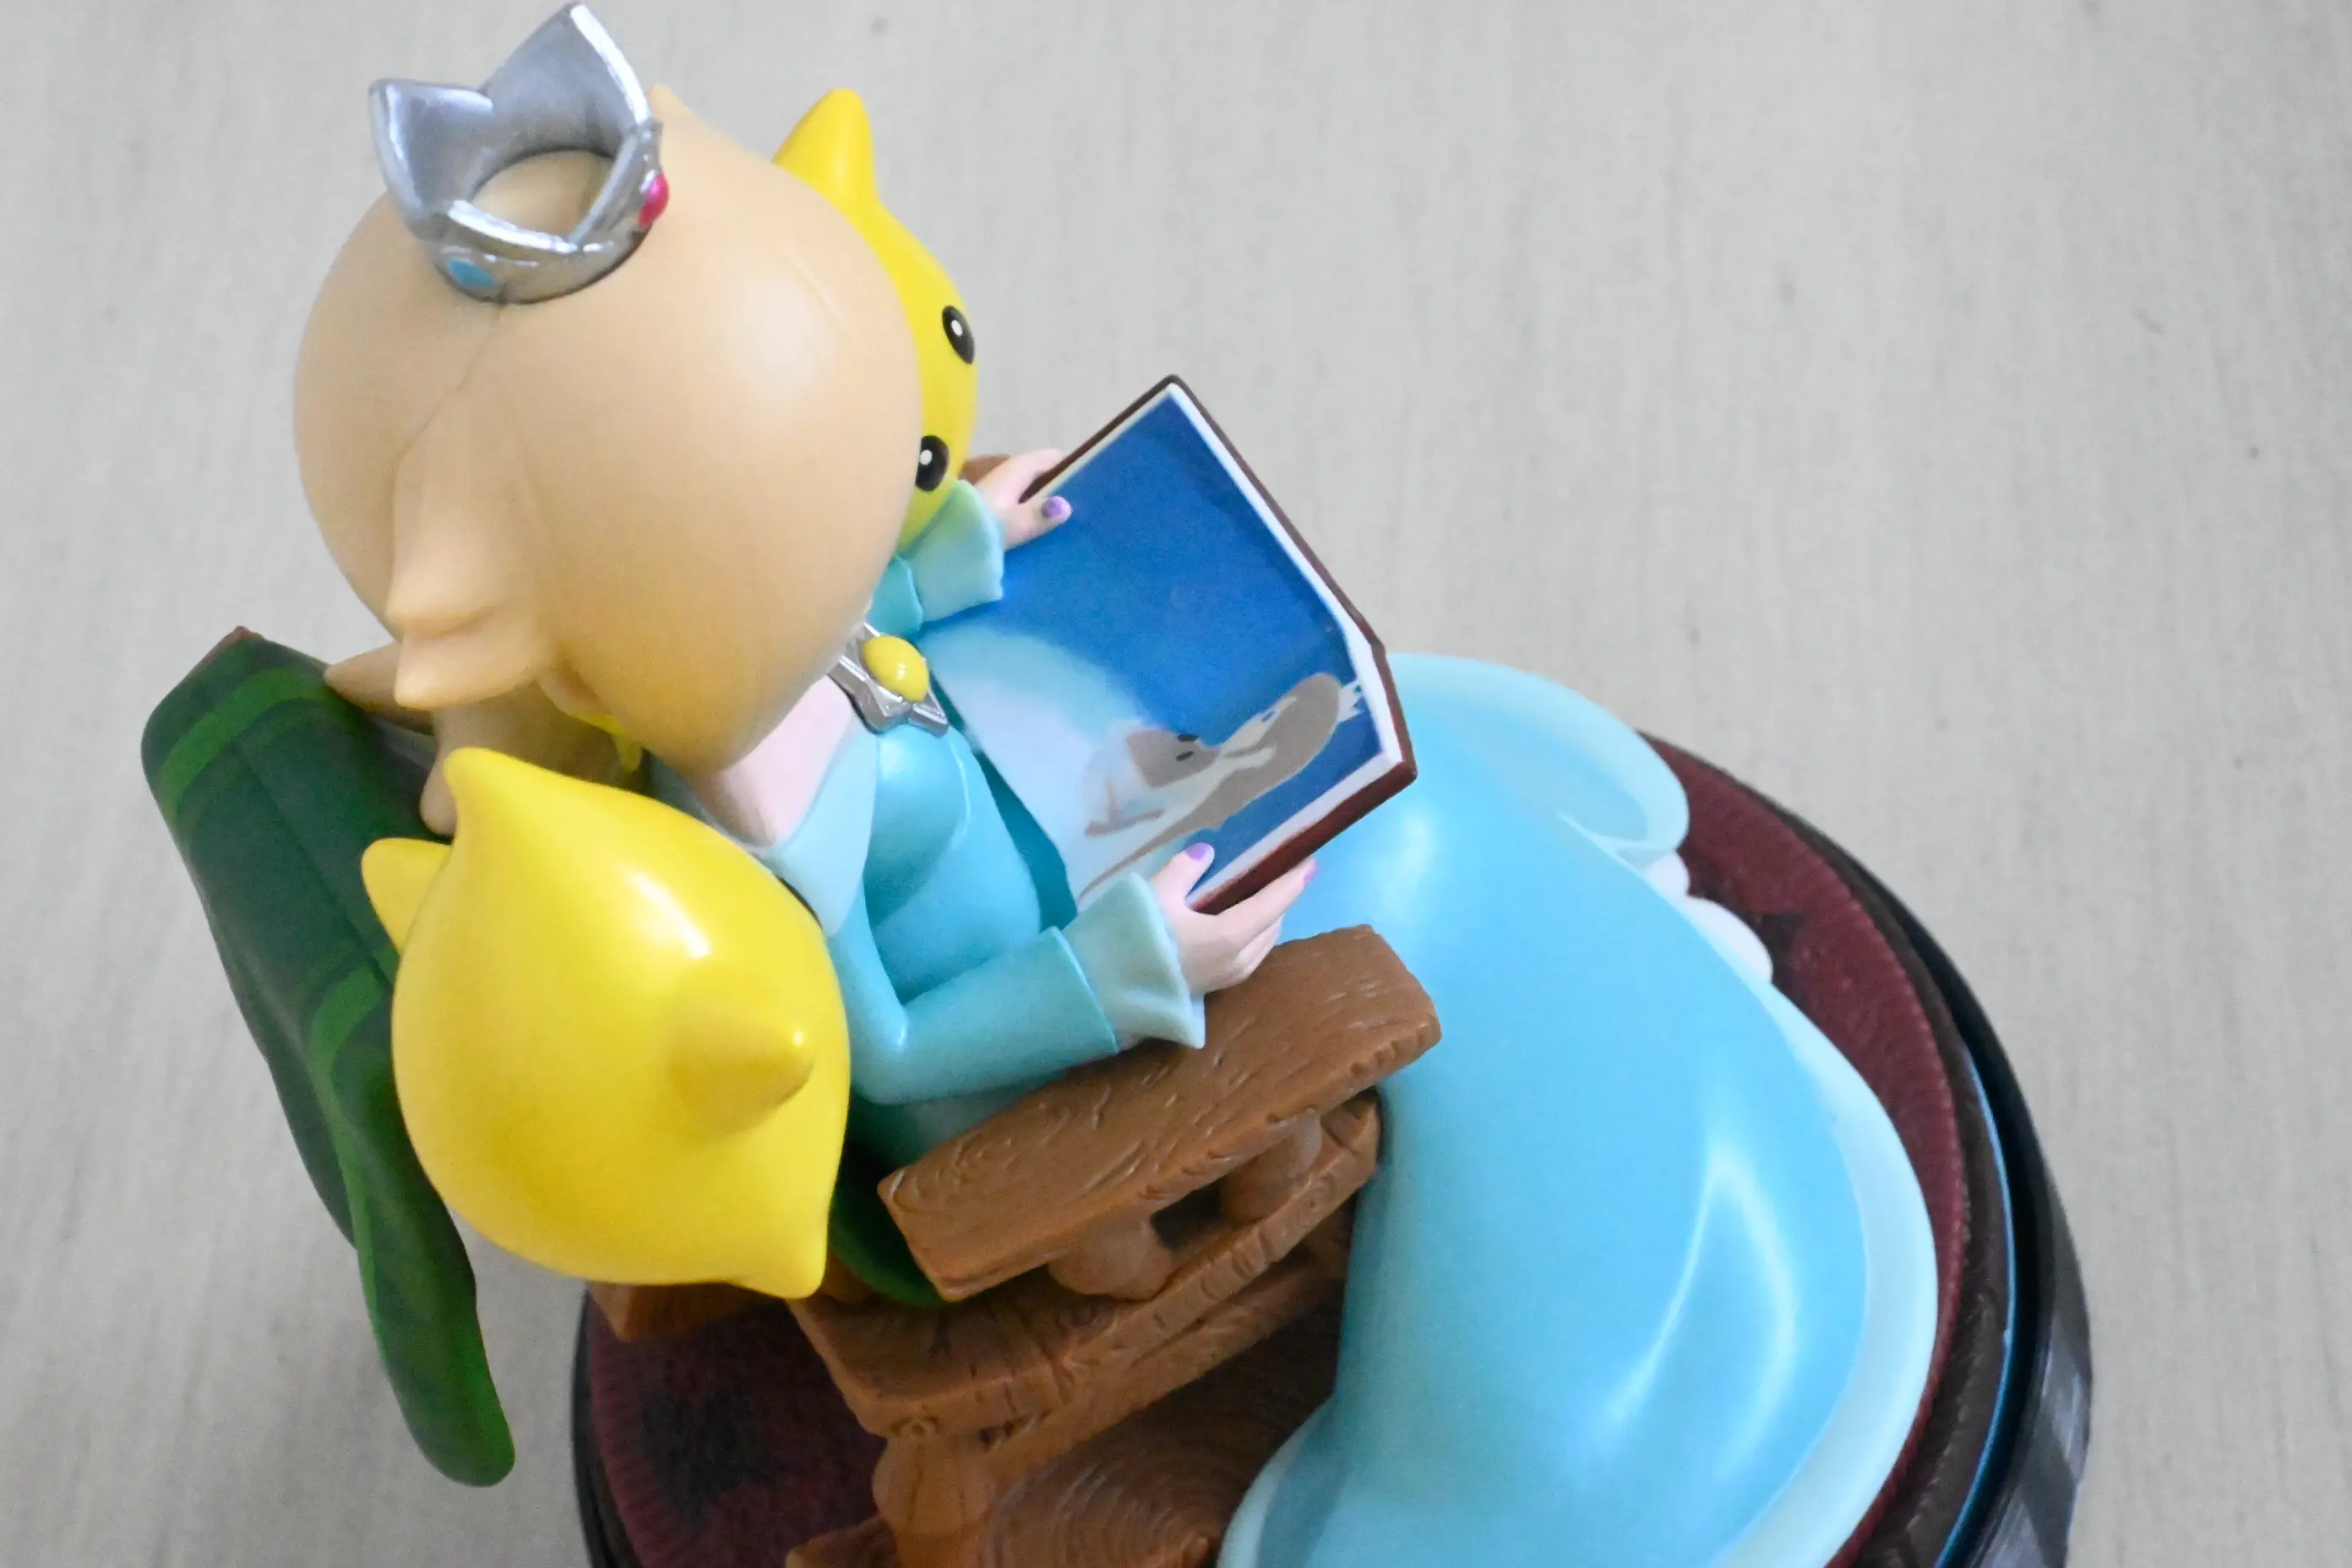
Fans have certainly taken note of the increase in detail with these amiibo. I especially appreciate that the pages of Rosalina’s Storybook are printed and the craters and pipes of Gateway Galaxy are present.
For amiibo collectors, getting creative with how to display your collection has always been part of the fun. These ideas are what I’ve come up with so far and I wanted to document the process in case anyone else wanted to try it out.
Notes
As always, use caution and DIY at your own risk. I’m sharing what worked for me, but results may vary.
Any links in this post are not affiliate links and are not endorsement of the products. They are simply here to document products I came across or used in the project.
-
I want to give a shoutout to this Reddit post, which nailed the library aesthetic. ↩